



Home is where the heart is, but it’s also where the stale air accumulates. You scrub the floors, wipe the counters, and yet, without airflow, the atmosphere turns heavy. It’s the same principle in a travel trailer. You live in a box that’s a fraction of your square footage. Cooking, sleeping, and showering happen within those walls. Eventually, the air gets used up.
Opening a window sounds logical until you’re doing 65 mph on the interstate. The wind pressure would rip the glass out. Rain? Forget it. Water damage inside a fiberglass shell is a nightmare. So, you’re stuck with whatever is trapped inside.
Cooked fish? Damp laundry? It all lingers.
The solution isn’t a window. It’s a roof vent. These units allow you to cycle out the bad air and pull in fresh oxygen without exposing your interior to the elements. You can crank them open while towing, provided you have the right hardware. It’s basic physics. Hot air rises. It leaves through the roof.
Understanding the Mechanics
A trailer roof vent looks like a hinged lid. It sits flush against the roofline until you deploy it. The cover swings upward, creating an exhaust path. Most models use a manual crank handle located inside the cabin. You twist it, the vent opens. Simple.
Some newer units feature electric actuators. You flip a switch, and the motor pushes the lid open. No hand strength required.
Beneath the lid, there’s a screen. This keeps the raccoons and mosquitoes out. It’s not just about smells. It’s about pests. Inside the vent housing, you’ll often find a small electric fan. Think of it as a bathroom exhaust fan for your camper. It pushes air out even when the wind isn’t cooperating.
Is DIY the Right Move?
Before you grab your drill, ask yourself: can you handle this?
Installing a roof vent involves cutting into your roof. One wrong cut and you’re looking at a leak that will rot your ceiling joists. It’s not just about fitting the vent. It’s about sealing it properly. But that’s a conversation for the next part. For now, just know that this isn’t a task for the faint of heart.
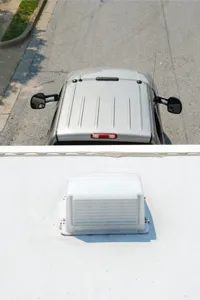

The High-Stakes Cut: Why New Installations Are Risky
Cutting a 14-inch square hole into your trailer’s roof is not a casual weekend project. It is a structural gamble. You are carving out 35.5 centimeters of metal or fiberglass to force air through the system. If your hands slip and the cut runs wide, you are left with a gap that won’t fit standard hardware. If your compass drifts, the hole becomes an oval. And if your saw blade bites into a crossmember—the metal framework hidden beneath the roof skin—you’re looking at a structural compromise or a very expensive repair.
There is also the electrical hazard. Trailers often run wiring along the roof deck for lights or antennas. Slice through a live wire and you’ve shorted out more than just a ventilation fan. The most dreaded outcome, however, is a leak. A roof vent that isn’t sealed with military-grade precision will let moisture into the insulation. Rot sets in fast in enclosed spaces. Mold follows.
Unless you have experience with sheet metal work and waterproofing, leave a brand-new vent installation to a licensed RV repair facility. They have the tools to cut clean squares and the sealants to keep the water out.
The DIY Route: Replacement is Different
Replacing an existing vent is a different beast entirely. The hole is already there. The structural integrity is already tested. The primary variable is whether you can replicate the original sealing job.
If you are swapping out a busted unit, the job is significantly easier. You can tackle it yourself with a few strict rules. First, measure the existing opening. Then measure the new vent. They must match. If the new vent is larger, you have to cut. If it’s smaller, you have to fill the gaps. Do not guess.
Pay attention to the mounting holes. Look at where the old screws went. Note the type of caulk used. Manufacturers provide specific instructions for a reason. Deviating from them is how you end up with a dripping ceiling.
The biggest stumbling block for DIYers is the seal. This is where most people fail. You need to apply a continuous bead of roofing caulk or butyl tape before the vent touches the roof. Then, after the screws are in, seal every screw head. Spend the extra ten minutes on the seal. It will save you thousands in future water damage repairs. Water is patient. It will find every microscopic gap.
Vent Covers: Weatherproofing Without Structural Changes
Once the vent is in, you need a cover. Roof vent covers are not just aesthetic. They allow the vent to stay open during rain or snow without letting precipitation inside. The design is simple but effective: it shrouds the leading edge, sides, and top, while leaving the back vented for air intake.
Installing a vent cover is far less invasive than cutting a new hole. You are drilling into the existing roof surface, not removing material. Most kits require drilling a few anchor holes to bolt the cover in place.
This is still a job that demands care. Drilling into the roof creates new entry points for water. You must follow the manufacturer’s instructions for sealing these drill holes. Use the same high-quality sealant you used for the vent itself. Do not skimp.
The goal is to move air, not water. A properly installed vent cover ensures your camper stays breathable while keeping the elements out. It is a small component that plays a huge role in the longevity of the roof structure. Ignore it and you risk compromising the entire ventilation system.


